Restoration Engine, Gearbox & Engine bay
Here’s described the restoration of the engine, gearbox and engine bay. For an even better result in execution and end result, it was especially paid attention to some details.

Engine, gearbox and front axle were expanded together.

All attachments removed.

Here is just a fraction of the new parts. All in all, the complete restoration of the entire car required more than 1000 part numbers.

Also from other manufacturers parts were needed. For example, rubber grommets for the connectors on the cable harness or here clamp brackets for the water hoses in all sizes from Volkswagen.

All parts to be galvanized were blasted first. Then black passivated. The front axle and the stabilizer were powdered black.

The front axle was reassembled. Of course with new bearings, wishbones, bolts and nuts.

A known problem of the F7R engine has also just been eliminated. The serration for the V-ribbed belt tensioner on the additional assembly carrier wears off over time. This carrier is no longer available.

The cast aluminum spline was milled off and teeth made in steel. Then bolted to the carrier. The problem is now solved permanently.

The parts to be painted were also blasted first. Furthermore, various aluminum parts on the engine and the intake bridge were blasted.

The steel parts were painted. The wheel bearings were replaced a few kilometers before. Therefore, they could continue to be used.

The engine block was cleaned, derusted and painted black with heat resistant paint. The innards of the engine have been revised a few kilometers before. That’s why the engine was not opened.

The complete engine harness was cleaned, retied and fitted with new rubber sleeves for the connectors.

The harness was tied with fabric adhesive tape.

The new rubber sleeves. Ordered from Volkswagen.

The attachments of the engine were mounted.

The gearbox has been completely revised. A more detailed report for the revision of a JC3 / 5 gearbox can be found here:

All parts were cleaned, the housing blasted, and replaced all wearing parts.

And reassembled.

Almost finished.

The fitted gearbox. It was also installed the Group N short shifter.

The gearbox was screwed to the engine.

The engine harness was led around the gearbox and other parts reassembled.

The starter and various holders were reinstalled.

The Engine and the gearbox were put back on the front axle.

The steering has been reinstalled.

Other holders and water hoses found their place again.

The devil group A complete exhaust system.

Retro pure!

The manifold and the downpipe were mounted.

The RSC Competition Pro PC57D-WS (Williams Special – blue gold) has been screwed on again.

The oil pipes from the steering were mounted.

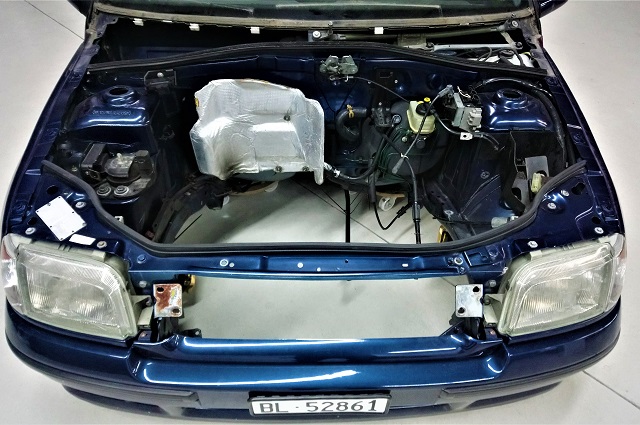
Now the engine bay came to it.

All parts were removed for painting the engine bay.

The body was sanded…

… and covered.

The engine bay was painted.

The rear box was also in a second step…

…painted.

Before the engine, gearbox and front axle were mounted, the wheel arches were also painted.

They were cleaned and painted.

Ready for the wedding.

And already installed.

No comparison to before.

The crossbeam had also to be painted from the outside.

And also the substructure of the bodywork from the outside.

The right side as well.

Missing still the radiator and the ECU. Otherwise the complete restoration is finished up to the “windscreen”.

It was still a Group N EPROM installed. Here the original one.

First a socket was soldered in and then the Group N EPROM was plugged in. Thus, you can always switch back to OEM by switching the EPROM. Now the F7R turns up to 7400rpm and hangs a little better on the gas.

The ECU housing was also blasted and a new data adhesive was made. Of course with RSC logo.

The ECU was installed again.

Done.
